Here at Enchant, we help companies communicate better with their customers. That means sending and receiving a ton of email. It’s kind of our thing. Setting up automatic email forwarding from Gmail (or Google Workspace) can be a little confusing, so we’ve documented all your options below.
The most common reason businesses forward their email is because they’re using help desk software or shared inbox software like Enchant. These software systems typically ask you to forward your email address to a provided forwarding address. Once email is automatically forwarded, you can work collaboratively on those emails within the platforms.
What options Gmail / Google Workspace offers to automatically forward email
There are three ways to automatically forward email from a Gmail account:
- Gmail Forwarding: This is used to forward all emails that arrive at a Gmail account. Gmail Forwarding is the most common and simplest to setup. Here, you would forward all incoming email that is being received at a gmail account to the provided forwarding address.
- Filtered Gmail Forwarding: This is used to forward a subset of emails that arrive at a Gmail account. You would need to do this if you have multiple aliases that all feed into a single Gmail account, and want to send them to different forwarding addresses. Here you would setup a Gmail filter to capture each subset of emails and then use the filter to forward the email to the provided forwarding addresses.
- Google Workspace Routing: This is an advanced option only available to Google Workspace customers. Using routing, you’re able to forward emails before they reach a Gmail account, thus can operate without an actual underlying Gmail account for the address.
Gmail Forwarding
With Gmail forwarding, you can setup gmail to forward all incoming emails to a provided forwarding address.
This is the simplest option to setup. Gmail will automatically keep a copy of all forwarded emails.
However, one note on spam: When using Gmail Forwarding, Gmail spam filters will apply... and Gmail does not forward anything it detects as spam. This is a positive and a negative. The positive is you get less spam, but the negative is that Gmail can sometimes make mistakes and accidentally mark legitimate emails as spam (and not forward them). To work around this, you will need to periodically check the spam folder for any false positives.
How to setup Gmail Forwarding
Step 1: Add a forwarding addresss in Gmail settings
From your gmail account, click:
-> Settings
-> See All Settings
-> Forwarding and POP/IMAP
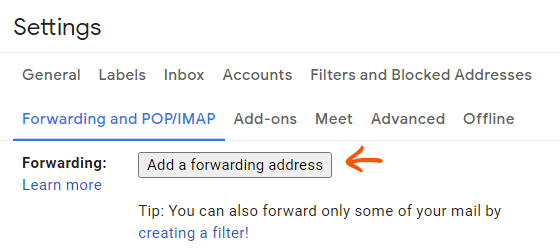
Under the Forwarding heading, click Add a forwarding address.
In the form that pops up, enter the forwarding address provided by your help desk or shared inbox provider and submit the form. Google will send a verification link to this email.
Step 2: Click a link sent to the forwarding address to verify
Now, login to the inbox provider and you should see an email from Gmail with a link.
Click on the link in the email to verify your email address.
Step 3: Activate forwarding using the now verified forwarding address
Finally, head back to the same “Forwarding and POP/IMAGE” page. Now you can select the verified forwarding address and activate forwarding.
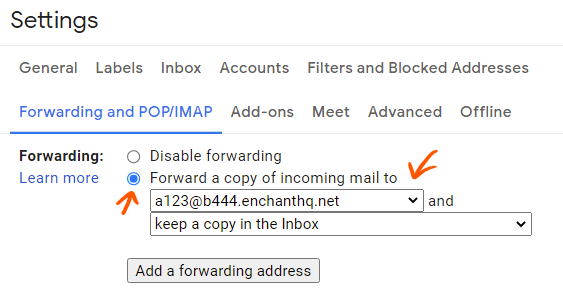
Remember to hit save at the bottom of the page!
Filtered Gmail Forwarding
Gmail filters allow you to capture emails that meet certain criteria and do something to them. Forwarding, is one of those things you can do to these filtered emails.
If you have multiple aliases all feeding into a single Gmail account, you can use Filtered Gmail Forwarding to forward those addresses to separate forwarding addresses.
This is a little more complicated to setup when compared to Gmail Forwarding. Gmail will automatically keep a copy of all forwarded emails.
However, the same note on spam applies: When using Gmail Forwarding, Gmail spam filters will apply... and Gmail does not forward anything it detects as spam. This is a positive and a negative. The positive is you get less spam, but the negative is that Gmail can sometimes make mistakes and accidentally mark legitimate emails as spam (and not forward them). To work around this, you will need to periodically check the spam folder for any false positives.
How to setup Gmail Filtered Forwarding
Step 1: Add a forwarding addresss in Gmail settings
From your gmail account, click:
-> Settings
-> See All Settings
-> Forwarding and POP/IMAP
Under the Forwarding heading, click Add a forwarding address.
In the form that pops up, enter the forwarding address provided by your help desk or shared inbox provider and submit the form. Google will send a verification link to this email.
Step 2: Click a link sent to the forwarding address to verify
Now, login to the inbox provider and you should see an email from Gmail with a link.
Click on the link in the email to verify your email address.
Step 3: Setup the filter
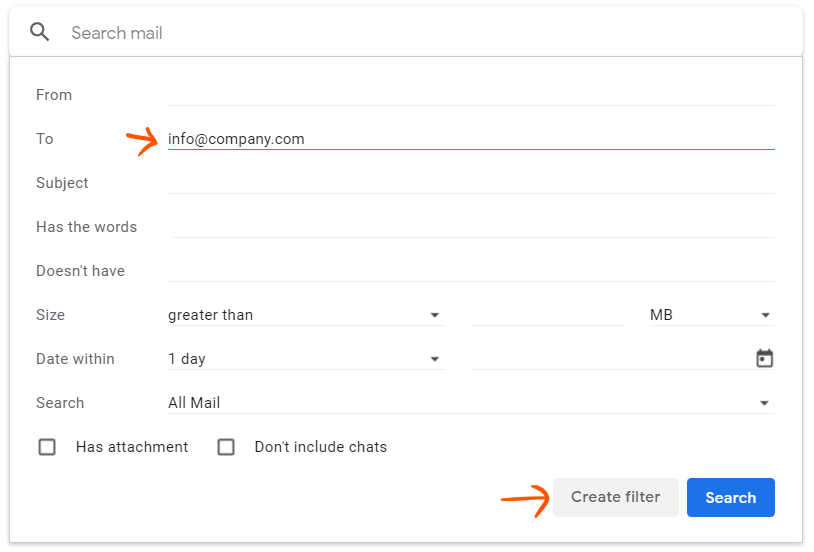
Open the advanced search panel.

Create a search that will capture the emails you want to forward and click Create filter.
Select the Forward it to action and pick the forwarding address you verified in Step 2. Now, click Create filter.
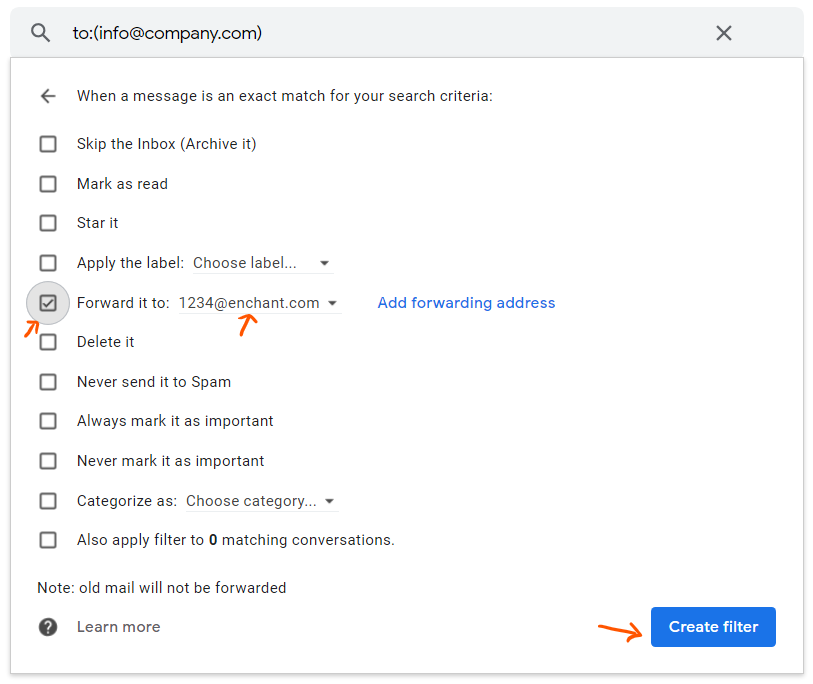
That’s it! Your filter is activated and will be forwarding any new email captured by the search.
Google Workspace Routing
Google Workspace Routing is only available to Google Workspace. That means it will work on a custom domain managed by Google, but not on a @gmail.com email address.
Google Workspace Routing runs at a lower level than Gmail. Using this functionality, you’re able to forward an email to a target forwarding address before it even hits Gmail. This means Gmail spam filters don’t apply. All email, including spam, will be forwarded to the target forwarding address.
How to setup Google Workspace Routing
Step 1: Go to Gmail Routing
Login to https://admin.google.com and go to:
-> Apps
-> Google Workspace
-> Gmail
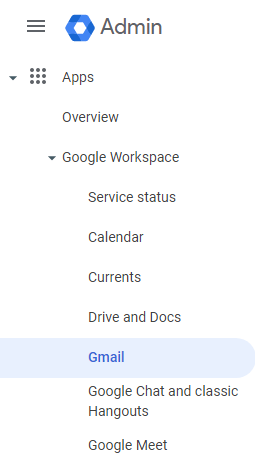
Click on Routing:
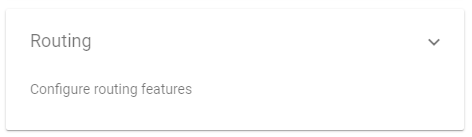
Step 2: Add an address map
On the left, select the top-level organizational unit.
Scroll down to the Recipient address map setting, then click Add another rule.
In the Messages to affect setting, select All incoming messages.
In the Address field, add the source email address. This is the address on your domain you want to forward to another address.
In the Map to address field, add the target forwarding address.
Check the Add X-Gm-Original-To header box. This is not necessary, but useful when trying to figure out what happened.
Click Add, and then at the bottom of the Add setting box, click Save.